How to Set Up a Date Input Node in a Legal Bot in e!
Add and configure a Date input node in your Legal Bot in e! — collect contract start dates, deadlines, and effective dates with ease. No coding needed.
The Input Date allows users to enter a date when interacting with the frontend of your bot. In this tutorial, we will guide you through customizing the Date Node to suit your needs.
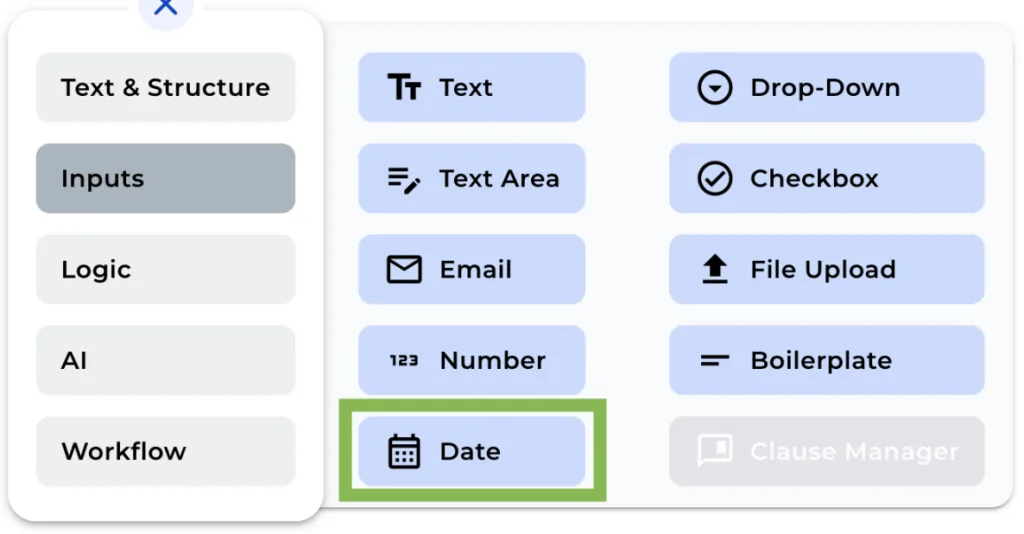
Step 1: Add the Date Node
Add a Date Node in your bot from the “+” menu.
Step 2: Change the Field Name
As with any other node, you can modify the field name of the Date Node for internal reference. Keep in mind that this field name will not be visible to the user in the frontend.
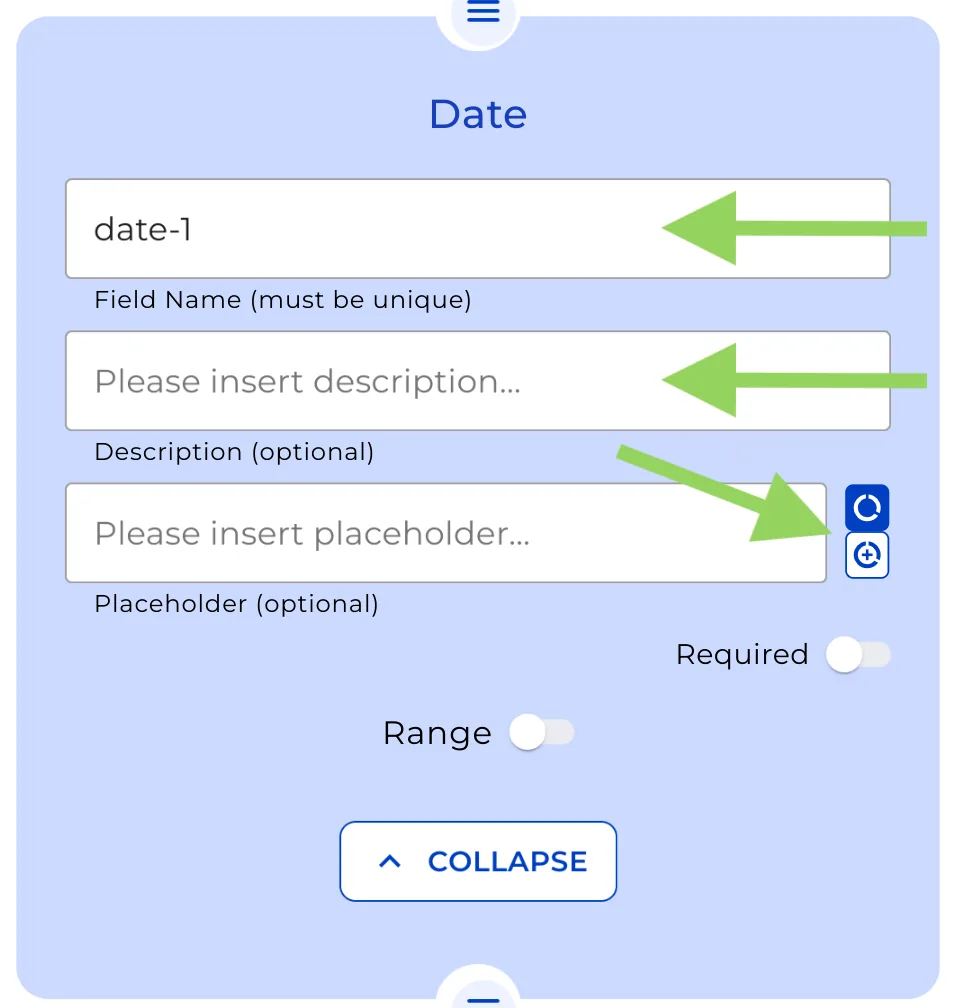
Step 3: Add a Description (Optional)
If you’d like to provide additional information for the user, you can include a brief description in the optional description box.
Step 4: Set a Placeholder or Default Value
Choose whether you’d like to add a Placeholder or a Default value for the Date Input field. Simply select the desired option.
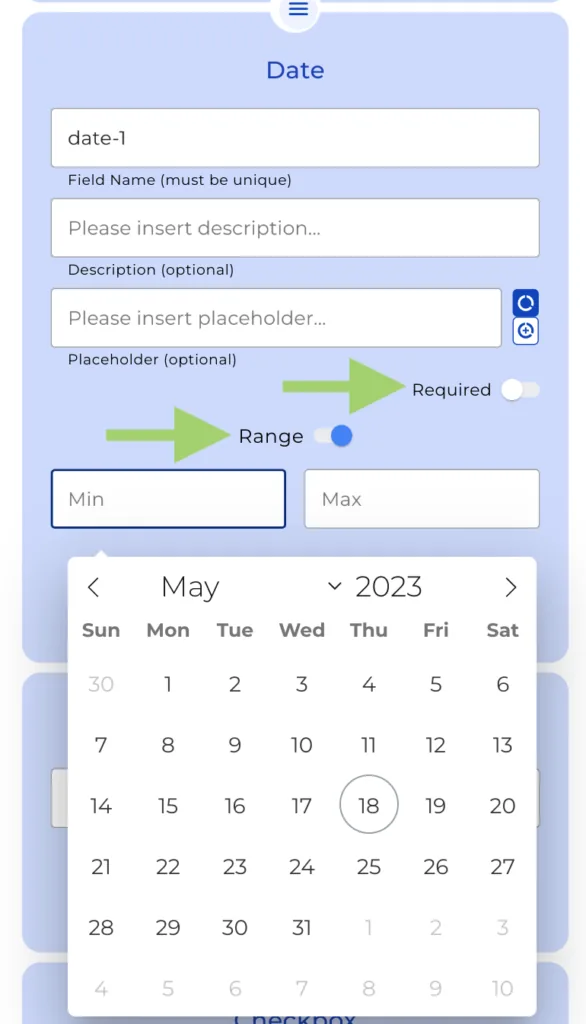
Step 5: Toggle the “Required” Option and Set a Date Range (Optional)
You can decide if the Date Input is mandatory by enabling the “Required” option. Additionally, you can specify a Date Range within which the input must fall.
Remember to click on “Preview” in the top menu to see how your bot will appear to your clients. This helps in making any necessary adjustments before implementation.
We hope you found this tutorial helpful. Happy automating with e!