How to Add, Manage & Delete External Users in Lexemo e!
Add, manage, and delete external users in e! — view consumer bots, send registration invitations, and control client access from your Admin Account.
Welcome back! In today’s guide, we’re diving into the e! Admin Account settings. We’ll be exploring how to adeptly add, manage, and seamlessly delete External members from your account. Ready to enhance your user management skills? Let’s jump in!
Step 1: Finding Account Options
Begin by heading to the left menu. Here, spot the “Account option” and click on it. This is your command center for handling External users linked to your company’s account.
Step 2: Accessing External Users
Next, open the “External Users tab”. This area is divided into many areas, all of which are intended to make user administration easier.
Step 3: The External Users Overview
Now, we see the “External Users” table. This is where you’ll see all users associated to your account. Look for details like “Avatar”, “Name”, “Email”, and “Role” for quick user identification. If you need to find someone fast, use the “search bar” to search a specific client.
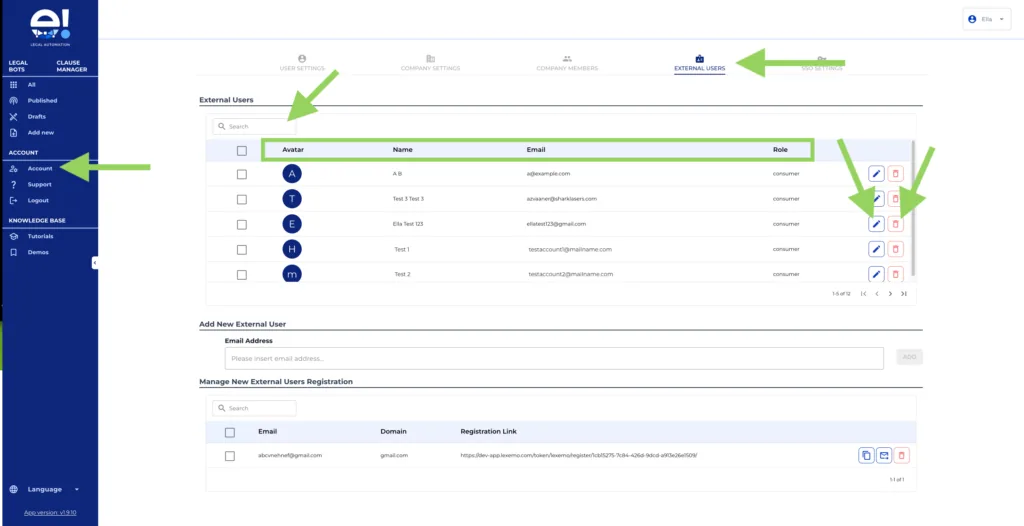
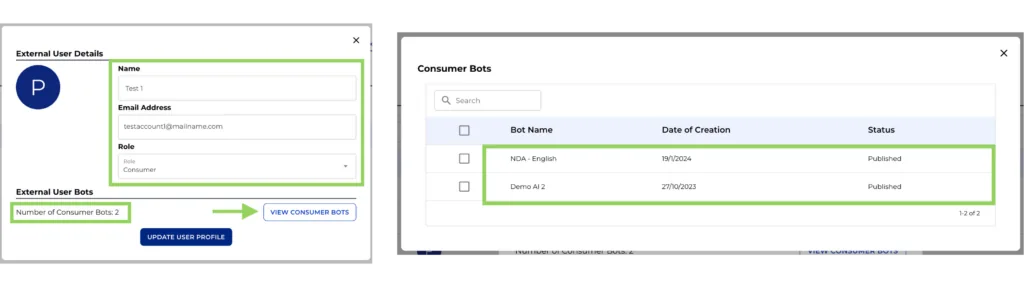
Do you need to check information from a User? Click the “pen icon button” to view their information. A modal will appear, showing user details and role. Also, you can see the Number of consumer bot for this user. If you want to see the specific bots, click the “view Customer Bots” button to see the details.
Do you need to remove a member? Easy, just click the “bin icon button”, and confirm that you want to delete the user.
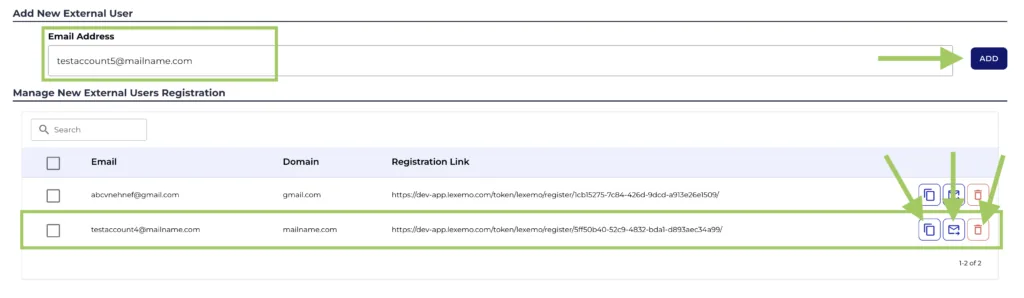
Step 4: Adding New Users
No users yet? No worries! Add them easily in the “Add New External User” section. Just pop in their email address, and voilà!
Step 5: Invitation Management Mastery
Lastly, we see “Manage New External Users Registration”. Here, you can easily manage all new invites. Choose to send the invite from your personal email address copying the registration link or send it via an automated email. If needed, invitations can also be deleted by clicking the bin button.
And there you have it! Mastering your company’s e! Users is just a few steps away. Here’s to making user management a breeze with e! Happy automating!